Wednesday, December 31, 2014

Happy New Year 2015


Wishing everyone a happy and healthy New Year!

Monday, December 15, 2014

Christmas Angel

Here is an angel that I've made for a family friend who has been very kind to us.  I hope she is happily surprised.  


Sunday, October 5, 2014

Some New Work for Autumn

Just a few of the things I have been crafting for Autumn.


Wool and Cashmere pumpkins trimmed with vintage lace.

New Folk Dolls:  Frieda and Fred  

Frieda has been sold leaving Fred alone for now!


Monday, August 4, 2014

Jane Austen Inspired

I have been meaning to make this apron for ages.  The one that Emma Thompson wore in Sense and Sensibility when Edward (Hugh Grant) comes riding up and she is hurriedly trying to get it off to look presentable for him.  Here is my version made from an old curtain panel from the forties or fifties and some rough linen.


It is quite fitted around the back with some buttons.


I will wear it with my handmade Jane Austen brooch of course.  I have a similar brooch for sale in my Etsy shop.


Tuesday, July 8, 2014

Camping Adventures

I have been away from the blog to satisfy my camping obsession.  We have taken the little A-frame out 5 times now for weekend trips.  Mostly to Vermont.  We learn a little about what we like and what not to do each time.  I have been keeping a log which is sort of a scrapbook of our adventures.

We are having fun.  I won't lie.  It's a lot of work!  I think these short trips require as much prep and clean up as a longer trip would but it has been an adventure with no major calamities yet.

Over the 4th of July we traveled to far northern Vermont to a section called the Northeast Kingdom.  It is beautiful up there but there is a lot of poverty too.  The side of Vermont you do not see in the travel brochures.  Our destination was Maidstone State Park situated on beautiful Maidstone Lake which is a deep glacial lake.


There was a five mile gravel road leading off the main road to get to the park and a retired gentleman (and talented wood carver) generously decorated tree posts along the way.  It made the road seem less long and bumpy because you were eagerly anticipating what sculpture would come next.  Here are a few:


And here are some stone ducks which could be seen everywhere along the way.  On every rock and on top of most mailboxes.  Not sure if this is the same guy but they were fun to spot.


No internet or cell service out here so this "relic" was in the middle of the woods!


I did some real campfire cooking.  I just love that woodsy smoky smell of everyone cooking their breakfasts in the woods.  It only took a few hours...ha ha!


Wednesday, May 21, 2014

Lighting for my A frame

The harsh LED lights were too much so it had to happen... A doily chandelier for my camper.  This is nice because it packs up good and flat and sets up easily.  I love the way it looks from the outside at night.  I will have to get a picture of that sometime.


Thursday, May 1, 2014

My New Baby

Introducing my newest obsession:  our Rockwood A-Frame Pop Up Camper!  We have come full circle and have decided to go camping once again.  We camped for years before we had kids and before we were married but once we had two little kids and a dog, camping became more of a chore.  After 10 years of owning and loving our little cottage in Canada we decided to sell last year.  It was time to downsize a bit and try going to new places.

I really had my heart set on a teardrop trailer or vintage style trailer but we have no where to store it and I did not want to pay for storage.  After going to our first RV show and visiting a couple of dealers in the the area we came upon the A-frame style pop-up.  These are cool because you get the hard walls of a trailer but they fold down and can store in your garage.  They literally set up and take down in about a minute, no wet canvas and they are really cute with tons of head room.  So we took the plunge and bought one.


Here it is set up in our driveway.  I would love to be able to get one in a sea foam green without all these graphics but not too much I can do about that right now.  Lets go inside:

These are the before shots.  I am wondering who designs the interiors for these RVs?  I would love a job with one of these companies because there are other colors out there besides brown!  I don't know where they find the upholstery and curtain fabric but there is a great opportunity for someone to improve on the looks of all of the RVs that we looked at.  This one was not as bad as some we saw.  I know that they are trying to choose something that hides the dirt but there are better choices.


I dug out some of my old vintage textiles and a friend of mine gave me some fabric she was not using so the cost was really spent on notions such as piping, zippers and velcro...lots and lots of velcro!


I made slipcovers for the cushions.  The originals are intact underneath (our salesman was aghast that I would choose to tear our new camper apart!).  I used a vintage textile for the piping and teal cotton for the body of the cushions.  I also made new hinge covers out of a heavy weight teal linen.  Bye bye  brown paisley.


I am kind of going with a travel theme using my old state tablecloths and state souvenir glasses.  I made some accent pillows from vintage textiles including the old Girl Scout print which I have been saving for years for just the right thing!  I just love it.


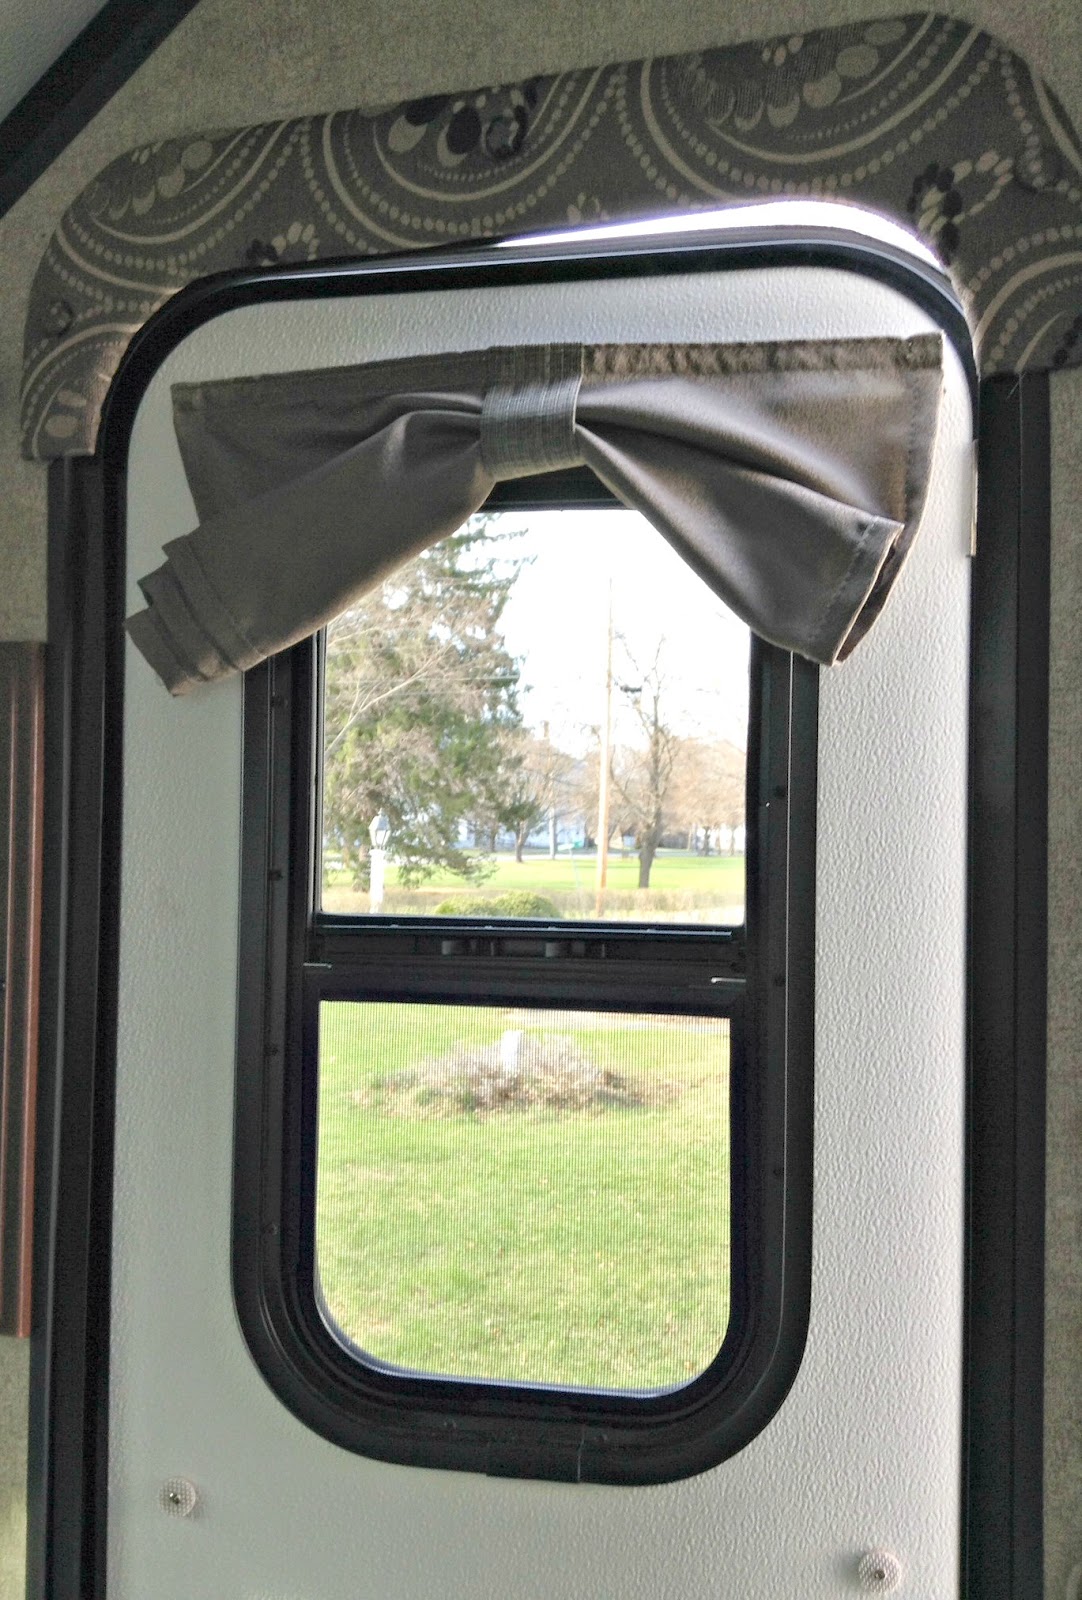
New curtains were made from an old table cloth that was still in good shape.  I used some old bakelite buttons on the tie backs.


I used white linen on the smaller window and tablecloth fabric for the tie back.


The door now has some cute vintage fabric print curtains and a newly upholstered header.


I would still like to paint the faux wood cabinets something lighter but my husband is a bit nervous about that....maybe next season!  


We purchased a memory foam mattress topper to help cushion the bed better.  RV mattresses are notoriously uncomfortable.  I am ready for my nap and to look out the stargazer window.

I have tried to make a couple of video tours but have not figured out how to successfully put them on my blog.  Something for the future.


Sunday, March 30, 2014

Homework

Here are some home projects I have completed lately.  I have been turning my attention to those projects that I've been meaning to do for some time.

Our old house staircase has been in sad shape since I removed the blue carpeting that was there when we moved in 15 years ago!  I am not a fan of carpeted stairs and couldn't really afford a nice one anyway so I painted a runner.  Easier said than done!  The taping was really challenging because the stairs are all wonky and it was hard to keep a straight line.  I finally had to put to rest that it would be perfect and fudged some areas but it is definitely an improvement over the old scuffed up stairs.


I just completed two slipcovers for the two chairs in the sitting room.  They were covered with my first two attempts (many years ago) of slipcovering before I had any idea of what I was doing.  I invested in this DVD from Shelley Anderson who makes slipcovering look so easy it is criminal!  I cannot tell you how much I have watched this DVD over and over and have marveled at how perfect her slipcovers turn out.  Plus I am envious of her Juki industrial super zippy sewing machine.  If you want to do a slipcover I cannot recommend this DVD highly enough!  I even purchased her advanced slipcovering guide to tackle the arm chair with telephone arms.  I did not know they were called telephone arms but the front of the arms do have this ear shaped piece that curves inward that does look like an old fashioned telephone (the kind that only people of my age would recognize!).  Let me tell you those arms plus the heavily scrolled back were challenging little suckers!


I am pretty pleased with this one and I love the knife pleats.  It was relatively straight forward and very much like the chair that Shelley does in her course.  I made a cute vintage barkcloth pillow to accent it which I love.


Here are those telephone arms and I found that if I fitted one piece and cut a matching one for the other side that was the best way to keep them identical.  They are very prominent and they really need to be identical and let the rest of the slipcover fit to them.


Now I had the bright idea that I would do a scalloped hem on the skirt and I learned another thing:  Aways put vents in the corners!  I had the whole thing done and the skirt was too tight.  I was not going to take that whole thing off since I had already serged the seams so I ended up cutting the back corners and putting in a ruffled vent.  It doesn't look awful but it is not ideal and it really bugs me right now.  I do like the scallops but the knife pleats were easier.


I also screwed up the band and the seam shows in the front instead of the sides where is should be.  I ran out of fabric and was not going to buy more so I will just live with it and it will remind me not to make that mistake again.  Speaking of fabric, I used drop cloths from Home Depot.  Would not recommend that again.  Each drop cloth is a different weave and shade of color and you never know what you are going to get!  The quality is not that good and for all the time and effort that goes into these things you are better off buying decent fabric.  I should know better.   The pillow I made from an old Waverly print.


Having both chairs with the same slipcover does make the room look more united.  Next up I will paint that table in the foreground with some homemade chalk paint.  It has lovely details that should not be covered up.  Thanks for suffering through my slipcovering/DIY woes and victories!


Tuesday, March 18, 2014

Mom's Last Thrift

It's been almost a year since my mother passed away.  I've had a lot of time to reflect on the things she taught me and most certainly one of the pleasures we shared together was thrifting!  She was a clothes horse but never paid full retail price as she was the Queen of the thrift store find and way before it was fashionable too.  Even as sick as she was towards the end, she called me one day and said I found a cute jacket for you so you need to come and get it or I will mail it.   When we were going through her closet I found the jacket and remembered how she had described it.  It still had the tags and original pricey price on it from some boutique down in Florida.  I took it home with me but had not worn it because the color did not suit me.  However,  a little Rit dye did the trick and now it suits me fine!  Mom would be pleased.


It was really a sort of yellowish ivory which did not look good with my coloring.


I used Rit Pearl Gray dye.


Like this much better and I attached one of Mom's favorite pins for good measure.


Friday, March 14, 2014

New Soldered Art Books

Here are my latest soldered art books all finished.  I covered the spine of the mushroom book with a remnant of a vintage shriners collar that was all hand beaded with gold bullion beads and fringe.  It has that old velvet look like old stage curtains.  These are really fun to make...lots of steps!  I especially love the juxtaposition of the creamy plaster pages with the hard metal of the covers.  If you are interested they are in my Etsy shop.